
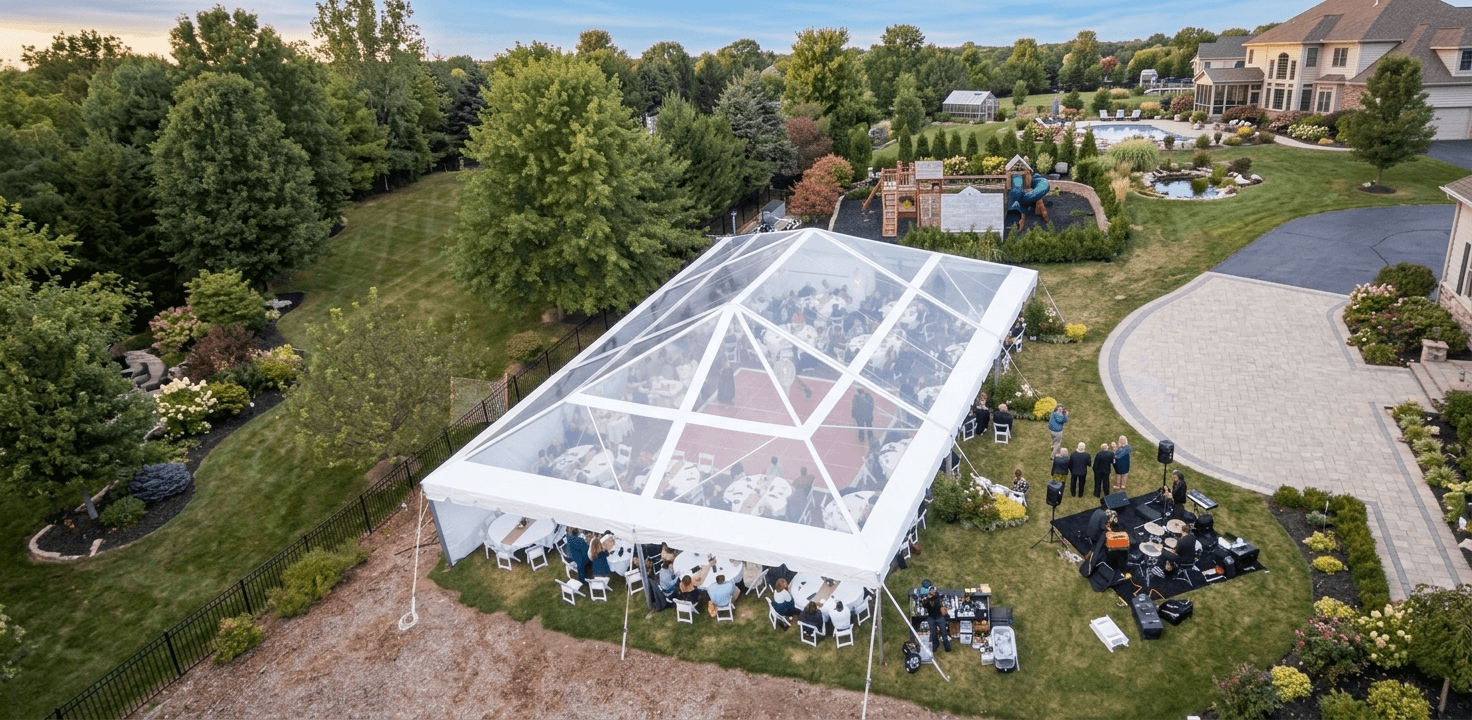
Tent roof panel welding joins multiple fabric sections to create a strong, weather-resistant finished roof. The quality of these welds—especially along hip seams and at seam intersections—plays an important role in how the finished structure performs under wind, rain, and repeated use. Using the right tent and structure welding equipment, maintaining proper panel alignment, and controlling the welding process can help manufacturers produce consistent, durable roof assemblies.
Kluczowe wnioski
- Tent roofs are commonly constructed from multiple fabric panels joined together with welded seams.
- Hip seams can experience greater stress than simple straight-run seams because of their location and geometry.
- Seam intersections deserve particular attention because multiple welds and stress paths meet in one area.
- Hot air welding offers flexibility for curved and angled roof seams, while hot wedge welding can be effective for longer, straighter runs.
- Accurate cutting and panel alignment help prevent puckering, wrinkles, and unnecessary stress on completed seams.
- Quality assurance should include inspection of seam intersections in addition to standard straight welds.
What Is Tent Roof Panel Welding?
Tent roof panel welding is the process of joining multiple sections of weldable fabric using controlled heat, pressure, and movement to create a larger roof assembly.
Commercial tent and structure roofs often need to be wider or more complex than a single roll of material can accommodate. Manufacturers therefore cut individual panels to the required dimensions and weld them together to create the final roof.
The exact process depends on the material, roof design, seam geometry, and production requirements. Manufacturers should confirm that the fabric is compatible with the selected welding process before establishing production settings. Learn more about weldable materials used across coated fabrics.
How a Tent Roof Is Built From Multiple Panels
Fabric panels are cut according to the shape and dimensions required for the finished structure. These sections are then positioned and welded edge to edge or with a specified overlap.
As tent size increases, so can the number of panels and seams required to complete the roof. Cutting and positioning accuracy become increasingly important because an error in one panel can affect alignment farther along the assembly.
Consistent panel preparation helps create a roof that lays correctly once installed and reduces the need to compensate for dimensional differences during welding.
What Makes a Hip Seam Different From a Sidewall Seam?
A hip seam runs along the sloped area of a tent roof where adjacent roof panels meet. Unlike many sidewall seams, which may follow relatively straight paths, roof seams can involve changes in direction, angles, and intersections with ridge or eave seams.
This geometry makes maintaining consistent alignment, heat, pressure, and travel speed especially important. A small alignment error early in the process can become more noticeable as the weld progresses.
Why Seam Intersections Are Critical Areas on a Tent Roof
Seam intersections deserve additional attention because they bring multiple weld paths together in a relatively small area.
Along a straight weld, loads can be distributed over the length of the seam. At an intersection, however, forces caused by fabric tension, movement, and wind may act from several directions.
This makes careful welding and inspection particularly important at the point where hip, ridge, or eave seams meet. For additional information on keeping tent seams weather-resistant, see our waterproofing guide for tent seams.
How Wind Load Can Affect Seam Intersections
Fabric structures move under changing environmental conditions. Wind can create uplift and tension across roof panels, and those forces travel through the fabric into adjoining seams.
Where several seams meet, the load path becomes more complex. Properly constructed intersections help the finished roof manage those forces without creating a localized weak point.
The design of the tent, material characteristics, reinforcement strategy, and weld quality all influence how an intersection performs.
Common Problems at Roof Seam Intersections
Manufacturers should watch for several potential issues around intersection points:
- Incomplete fusion: Overlapping weld passes may leave areas that have not bonded consistently.
- Heat-related damage: Applying too much heat while completing multiple passes can potentially damage or distort the coated fabric.
- Seam separation: Repeated flexing and tension may expose inconsistencies in the weld over time.
- Water intrusion: Small gaps or inconsistencies around complicated seam geometry may create a path for moisture.
| Seam Location | Typical Consideration | Potential Issue |
|---|---|---|
| Straight sidewall run | Relatively consistent seam path | Inconsistent heat, speed, or pressure |
| Hip seam | Angled or changing geometry | Misalignment, puckering, inconsistent fusion |
| Seam intersection | Multiple weld paths meet | Incomplete fusion, excess heat, separation, or leakage |
Choosing a Welding Method for Roof Panel and Hip Seams
There is no single welding method that is right for every portion of every tent roof. The ideal process depends on the material, seam geometry, production volume, and desired level of automation.
For many manufacturers, hot air and hot wedge welding can complement one another within tent production.
Why Hot Air Welding Fits Curved and Angled Roof Seams
Hot air welding technology uses heated air to soften the thermoplastic coating at the seam interface. Pressure is then applied to join the layers together.
One advantage of hot air welding is its flexibility. It can accommodate applications involving changes in direction, varying seam geometry, and other areas where maneuverability is important.
This can make hot air a practical choice for hip seams and other portions of a tent roof where the welding path is not simply a long, straight run.
Successful hot air welding depends on balancing heat, speed, pressure, airflow, nozzle configuration, and material characteristics. Production settings should always be established for the specific fabric and application being welded.
When Hot Wedge Makes Sense on a Roof
Hot wedge welding for straight runs can be well suited to applications where the seam follows a long and consistent path.
Instead of heated air, a hot wedge directly contacts the material at the seam interface before pressure rollers complete the weld.
For certain roof designs, manufacturers may use hot wedge welding for straight sections and another process, such as hot air, where seam geometry becomes more complex. The best approach depends on the construction of the finished product and the capabilities of the equipment being used.
Where RF Welding Fits
Radio frequency welding uses electromagnetic energy to create a weld in compatible materials.
While large tent roof panel construction may favor continuous welding technologies for long seams, RF welding can be considered for compatible applications where its process characteristics and tooling are appropriate.
The correct technology should ultimately be selected based on material compatibility, seam design, production requirements, and the finished product.
How to Assemble and Weld a Multi-Panel Tent Roof: Step by Step
A repeatable process helps reduce variation between operators, panels, and finished roofs.
Step 1: Confirm Panel Layout and Cutting Accuracy
Start by verifying the dimensions and orientation of each panel before welding.
Cutting errors can compound as additional sections are assembled. A panel that is slightly out of position at the beginning can create alignment problems farther along the roof.
Confirm panel identification, dimensions, orientation, and seam allowances before beginning production.
Step 2: Align Panels at the Hip Before Welding
Position the panels according to the required seam configuration and check alignment along the entire planned welding path.
Do not rely on correcting major alignment problems as the machine progresses. Once material has been welded, correcting wrinkles, puckering, or incorrect positioning can require significant rework.
Proper guides, material handling systems, and operator procedures can help keep the fabric positioned consistently.
Step 3: Weld the Primary Hip Seam
Once the panels are positioned correctly, complete the primary welding pass.
For heat-based welding, operators must maintain the proper relationship between temperature, speed, pressure, and airflow or wedge temperature. These parameters should be developed through testing for the specific material being used.
Changes in material thickness, coating, ambient conditions, seam configuration, or machine setup may require adjustments.
For PVC-coated materials, manufacturers can learn more about PVC-coated fabric welding requirements.
Step 4: Reinforce the Seam Intersection as Required
Pay particular attention to the point where the hip seam meets another roof seam.
Depending on the roof design, material, and engineering requirements, the intersection may require additional welding or reinforcement. Any reinforcement procedure should be designed to create the required strength without unnecessarily overheating the material.
Step 5: Inspect and Test the Completed Roof Seam
Inspect the completed seam before moving the roof into final assembly or shipment.
Look for uniform weld appearance, correct positioning, wrinkles, gaps, damaged coating, or areas that appear different from the established acceptable weld standard.
Where appropriate, manufacturers can also perform destructive or nondestructive testing according to their internal quality requirements.
| Krok | What to Check | Common Mistake to Avoid |
|---|---|---|
| 1. Verify panels | Dimensions, orientation and seam allowance | Beginning with incorrectly cut or positioned material |
| 2. Align panels | Position along the entire seam path | Trying to correct major alignment errors during welding |
| 3. Weld seam | Heat, speed, pressure and material tracking | Using settings that have not been validated for the material |
| 4. Address intersections | Fusion and required reinforcement | Overheating or overlooking the intersection |
| 5. Inspect and test | Weld appearance, strength and consistency | Checking only easy-to-access straight sections |
Quality Assurance for Roof Panel and Hip Seams Before Shipment
Quality assurance should evaluate more than the appearance of a long, straight weld.
Because hip seams and intersections involve more complicated geometry, manufacturers should include these areas in their inspection and testing procedures.
Why Straight-Seam Sampling May Not Tell the Whole Story
A sample taken from the middle of a straight seam can help verify that welding parameters are producing an acceptable bond under those conditions. However, that sample may not represent what occurs when the welding path changes direction or intersects another seam.
Intersection-specific inspection provides an additional opportunity to identify inconsistencies before a completed tent reaches the customer.
Practical QA Checks Before a Roof Ships
A manufacturer's QA procedure may include:
- Visual inspection of completed hip seams and seam intersections
- Verification that panels remain correctly aligned after welding
- Pull or peel testing of representative welded samples
- Water testing where appropriate for the finished product
- Documentation of validated machine settings and production parameters
- Inspection for wrinkles, gaps, coating damage, or incomplete fusion
Manufacturers should establish acceptance criteria based on their materials, product design, engineering requirements, and applicable standards.
Reinforced perimeter areas may require additional processes as well. Learn more about keder welding for reinforced tent edges.
How Miller Weldmaster Supports Roof Panel and Hip Seam Production
Tent manufacturing can involve everything from long straight seams to curves, hems, reinforcements, and complex roof panel assemblies. Miller Weldmaster develops fabric welding equipment and custom production solutions designed to help manufacturers improve consistency, efficiency, and repeatability.
Depending on your application, the right solution may include hot air or hot wedge welding technology, specialized guides, material handling, cutting, or customized automation.
For manufacturers looking to reduce manual processes or improve production consistency, automated tent and structure welding solutions can be designed around specific production requirements.
Because materials, seam geometry, production rates, and finished-product requirements vary, machine selection should begin with the application itself. Our team can evaluate your material and production goals to help determine the appropriate welding technology and equipment configuration.
Frequently Asked Questions About Tent Roof Panel Welding
What is a hip seam on a tent?
A hip seam is a welded seam running along a sloped portion of a tent roof where adjoining roof panels meet. Hip seams can involve angled or changing seam paths and may intersect with ridge or eave seams, making alignment and welding consistency particularly important.
How do you weld tent roof panels?
Tent roof panels are cut and aligned according to the required roof design before their overlapping edges are joined using a compatible welding process. Hot air welding can provide flexibility for curved or angled areas, while hot wedge welding can be useful for long, straight runs. Welding parameters must be established for the specific material and seam configuration.
Why can tent seams leak at intersections?
Intersections bring multiple weld paths together, creating more complicated geometry and potential stress concentration. Incomplete fusion, material damage, poor alignment, or inconsistent welding around these points can create potential paths for moisture.
What welding method is best for curved tent panels?
Hot air welding can be particularly useful for curved or angled fabric seams because of its flexibility around changing seam geometry. The best welding method still depends on the material, seam design, production requirements, and equipment configuration.
How many panels make up a tent roof?
The number varies according to the dimensions and design of the tent, the width of the available fabric, and the manufacturer's construction method. Larger or more complex roofs generally require additional fabric panels and welded seams.
How do manufacturers test roof seam strength?
Testing methods can include visual inspection and pull or peel testing of representative welded samples. Depending on the product and manufacturer's quality procedures, completed roof sections may also undergo water or other application-specific testing. Hip seams and intersections should be included in the QA process rather than evaluating only straight seam sections.
Build Better Tent Roof Seams with the Right Welding Solution
Reliable tent roof production starts with accurate material preparation, proper alignment, controlled welding parameters, and thorough inspection. Paying additional attention to hip seams and intersections can help manufacturers achieve consistent weld quality across complex roof assemblies.
Whether you are looking to improve an existing tent production process, increase output, or explore automation, Miller Weldmaster can help evaluate your application and determine the right equipment for your manufacturing needs.
Contact Miller Weldmaster to discuss your tent roof welding application.


